Mallory
Kent's
1966
Mustang Coupe
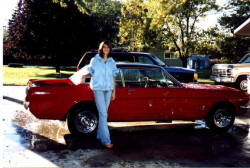 In
the beginning Ford created the Mustang.....
In
the beginning Ford created the Mustang.....
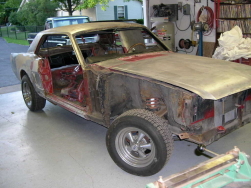
Marvin "The
Body & Paint King" does his magic.
All of the rotten body panels are removed so that
new ones can be welded back in place...
 The entire
body is completely worked over,
The entire
body is completely worked over,
prep'd and the first application of new
paint applied.
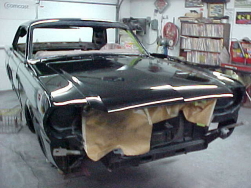
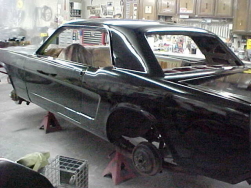 The transformation
has begun!.
The transformation
has begun!.
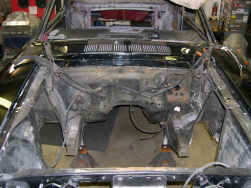
After closer inspection we found the original
rear subframe rails, torque boxes, and outer
wheel houses extremely rusty. So since we
were already planning on grafting in a MustangII
IFS front suspension, it just made sense to
fabricate entire full length bumper-bumper
structural tube frame rails. All the repair work
fixing the outer wheel houses will not be
shown here.
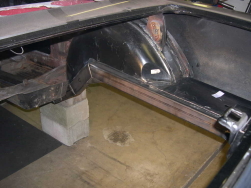
During the following chassis modifications it becomes very difficult to
find a place to properly
support the vehicle while the underside subframes are being cut out and
modified. So each
side will be done separately. The right side will be done first and the
vehicle supported on the
right side by cinder blocks and wood distributed evenly under the
rocker/floor seam edges. The
left side will be support by jack stands. Care is taken to keep
everything level and body panels
aligned. The front needs to be supported at radiator core support
before cutting out the shock
towers and front subframes. Once the right side is done, the cinder
blocks and jack stands will
be swapped side to side and vehicle re-leveled again.
 Entire front
suspension, steering, and shock
Entire front
suspension, steering, and shock
towers removed. Front subframes cut to fit
future MustangII IFS front end.
 Front right
subframe is cut away to enclose
Front right
subframe is cut away to enclose
2"x3"x.125" fabricated front frame rail.
Although not shown, fabricated front rail goes
back all the way thru the original OEM subframe
in the floor. Right subframe shown mocked up
in place.
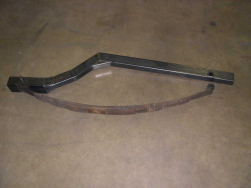 New
rear frame rail
fabricated from 2"x3"x.125"
New
rear frame rail
fabricated from 2"x3"x.125"
structural tubing. Fabricated to conform to original
OEM rear subframe shape and fit and to mount
OEM leaf springs. Section is fully jig welded to
maintain straightness. Front is gussetted into
4"x3"x.188" tube to enclose front spring eye
mount. All OEM spring mounting dimensions are
maintained so as not to alter final ride height.
Both right and left sides are fabricated at once so
they match each other exactly.
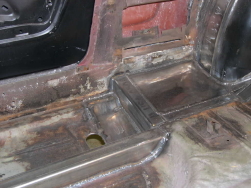
 OEM
floor and spring
hanger sliced out to fit
OEM
floor and spring
hanger sliced out to fit
new fabricated rear frame. Section is mocked up
under vehicle so that inner and outer wheel houses
can be modified and fabricated for a proper fit.
Front and rear heights set up to maintain OEM
dimensions. Frame width is narrowed to 31 1/2"
ID to fit OEM fuel tank and accommodate wider
rear tires.
 With
both new front
and rear frame sections
With
both new front
and rear frame sections
mocked up in the car, there is about 3/4" offset
per side from the front frame ID to the rear
frame ID. The floor is now sliced open to fit
the connecting 2"x3"x.125" tube. The tube is
cut to fit and tack welded in place under the
vehicle. The entire full length frame rail is then
removed and jig welded. It can now be installed
back in the car and permanently welded in place
(as shown).
 New
front right
frame rail is now fully welded in
New
front right
frame rail is now fully welded in
place. Rosette, gussets and edges welded on top.
Rosset and edges fully welded on opposite side
show.
 Inner
wheel house is
sectioned and moved inboard
Inner
wheel house is
sectioned and moved inboard
(mini tub style) approx 3 1/2" to accommodate a
12"-13" wide rear tire. Trunk floor repair panels are
sectioned, fit and welded in place. Wheel house is
fully welded top and bottom. Full length frame is
fully welded top and bottom front to rear.
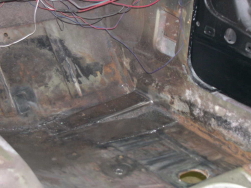
 Right
rear
2"x3"x.125" stub is fabricated to fit between
Right
rear
2"x3"x.125" stub is fabricated to fit between
the new frame rail and the rocker. Stub is located in the
proper position to mount the future roll bar main hoop.
Right rear floor sections also fabricated and welded in
place.
 Front
right stub
fabricated from 3"x1 1/2"x.125" to
Front
right stub
fabricated from 3"x1 1/2"x.125" to
connect frame rail to rocker at firewall. Front stub is
also located in the proper position for future roll bar
mount. Floor and firewall sections fabricated and
final welded in place.
The right side is completed. The left side will follow
the exact same process.
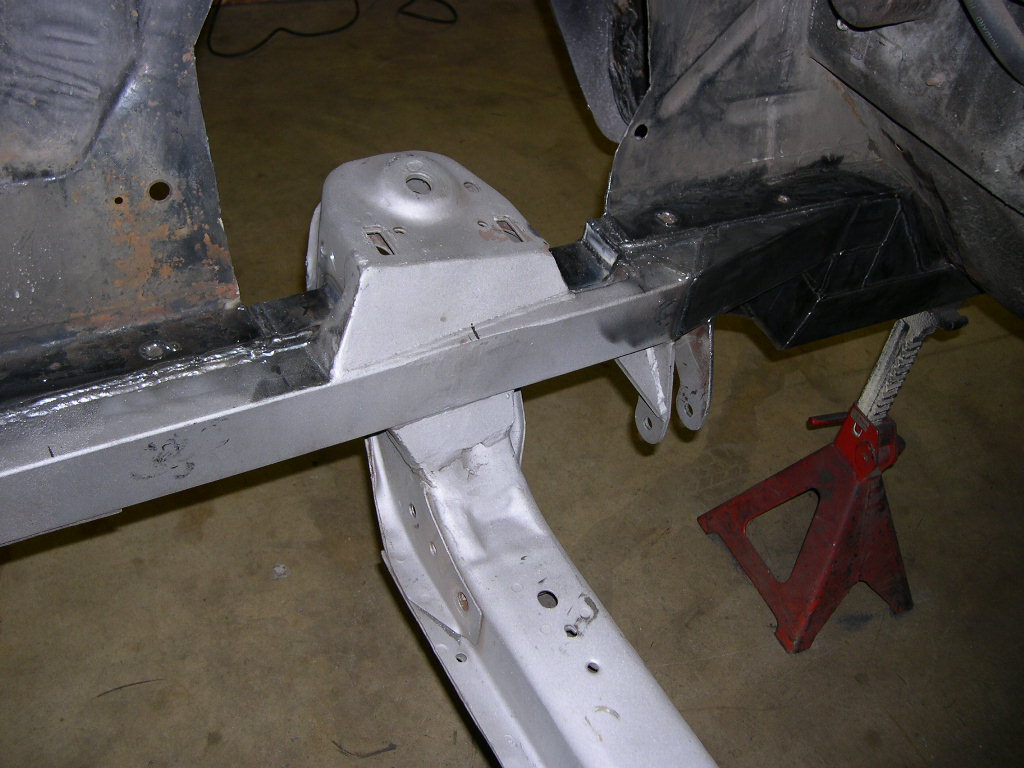
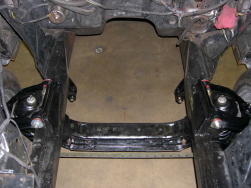 With
both frame
rails completed the front Mustang II
With
both frame
rails completed the front Mustang II
IFS suspension is grafted into place and fully gussetted.
Front suspension can then be completely assembled
with Pinto spindles and all new springs, a-arms, ball
joints, struts and shocks. Although not shown here a
9" Ford axle housing is narrowed by RK Racing to
tuck the new tires and wheels into the enlarged wheel
wells on the leaf spring & traction bar rear suspension.
 With
both front and
rear suspension completed the car
With
both front and
rear suspension completed the car
can now be set on the ground for the first time on its
new chassis and suspension.
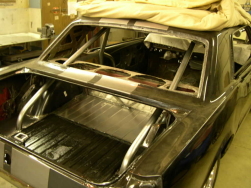 The
roll bars are
custom bent by RK Racing. The
The
roll bars are
custom bent by RK Racing. The
trunk floor and rear seat bulkhead panels are now
fabricated and welded in place.
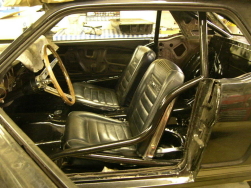 The
roll bars are
custom bent for easy access.
The
roll bars are
custom bent for easy access.
Steering column is modified to fit new rack &
pinion steering unit. Floor and interrior are now
painted.
(Click any pic from here down to enlarge)
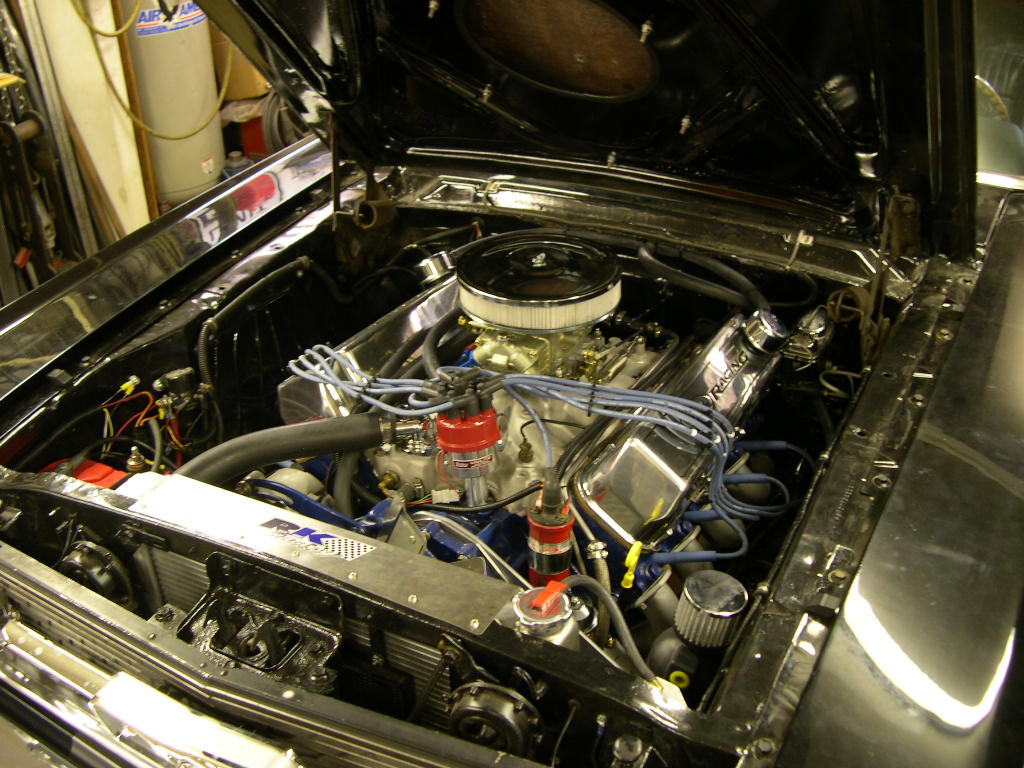 Massive
545 ci BBF engine and C4 trans is installed
Massive
545 ci BBF engine and C4 trans is installed
using a RK Racing fabricated front steel flat motor plate.
Custom 2 1/4" primary tube headers are then fabricated.
Rear of driver side Ford Motorsports valve cover is notched
for master cylinder clearance. Little short Mallory distributor
is used due to the lack of hood clearance. Holley 850 DP sits
atop Edelbrock Performer intake manifold. Summit 3 core
aluminum radiator and B&M trans cooler installed . Optima
battery remains in stock location.
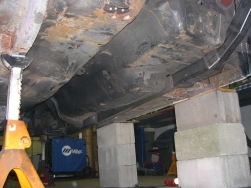
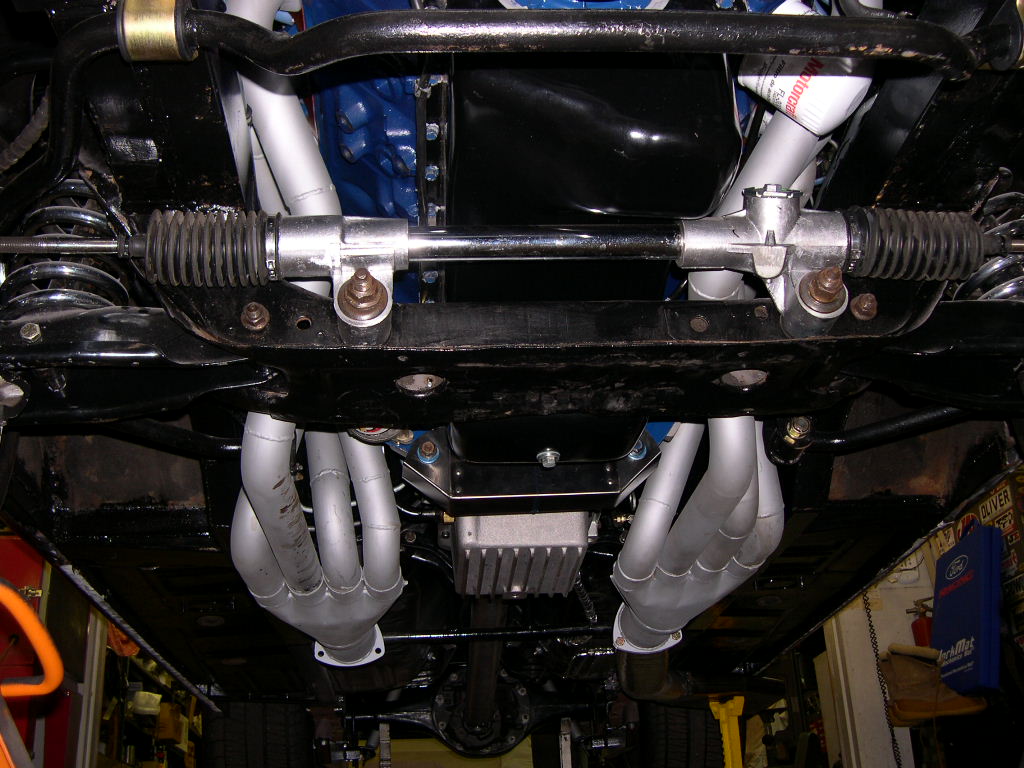 Bottom view engine compartment.
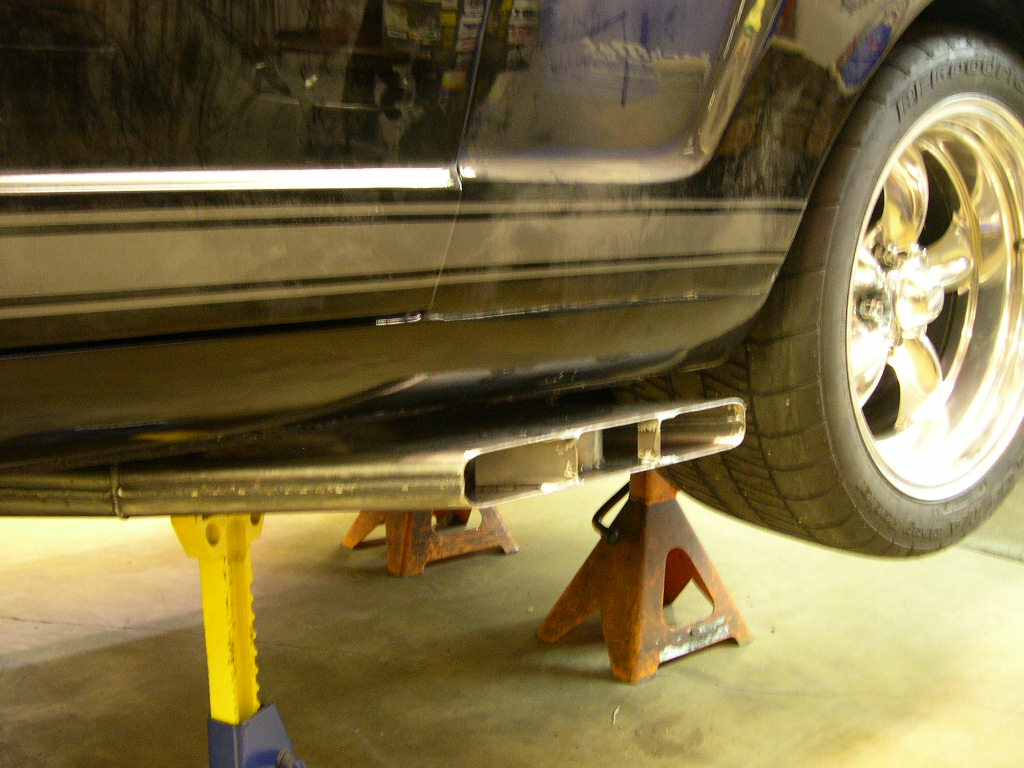
 Bottom
view passenger side fabricated header.
Bottom
view passenger side fabricated header.
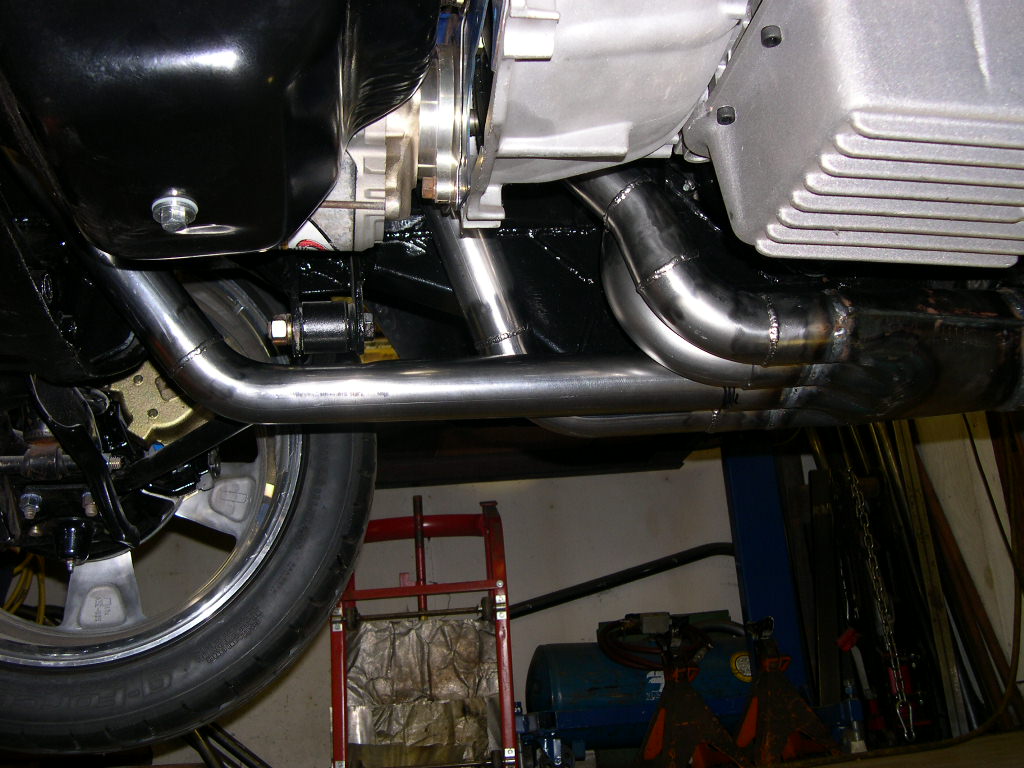
 Remainder
of exhaust is fabricated using 2 1/2"
Remainder
of exhaust is fabricated using 2 1/2"
exhaust pipe containing 12" long baffled muffler
inserts connected to Dr. Gas NASCAR "Boom
Tube" side exit outlets.
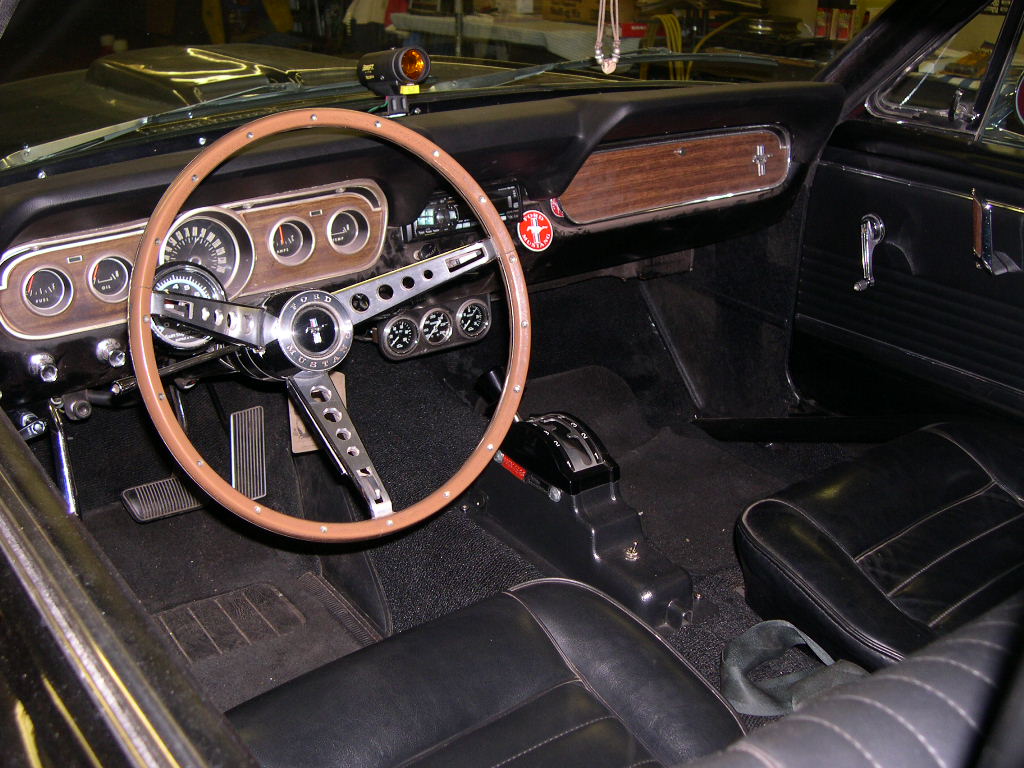 Interior
floor is insulated and carpet reinstalled.
Interior
floor is insulated and carpet reinstalled.
Winters shifter, tach, gauges, and remaining
interior all back together.
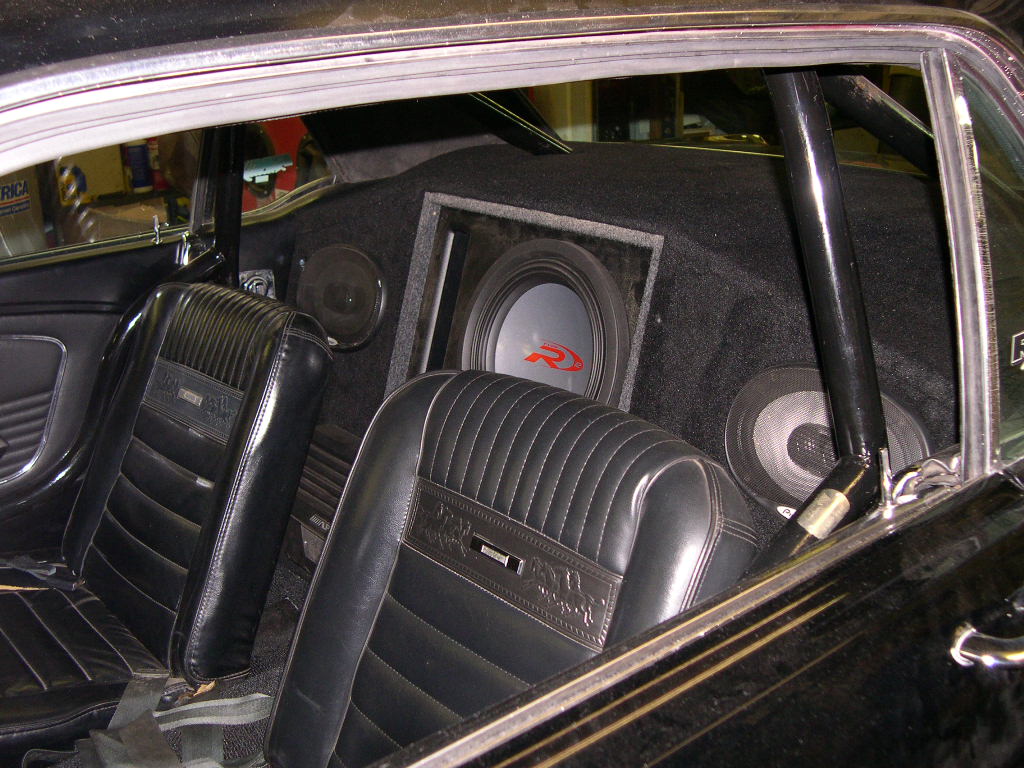 Rear seat area has been transformed into a
giant built in speaker, sub, & amp system.
This car has asesome power under the hood
AND in the back seat!
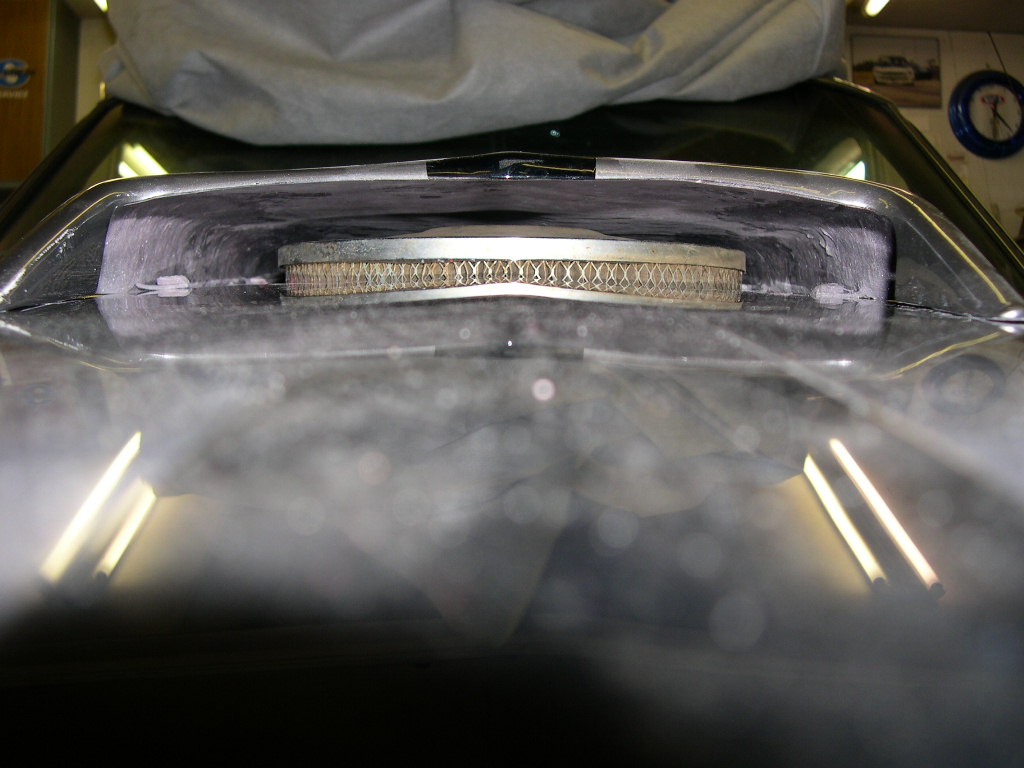 Hood
is cut to fit air cleaner diameter and
Hood
is cut to fit air cleaner diameter and
hood scoop is installed. Its a tight package!
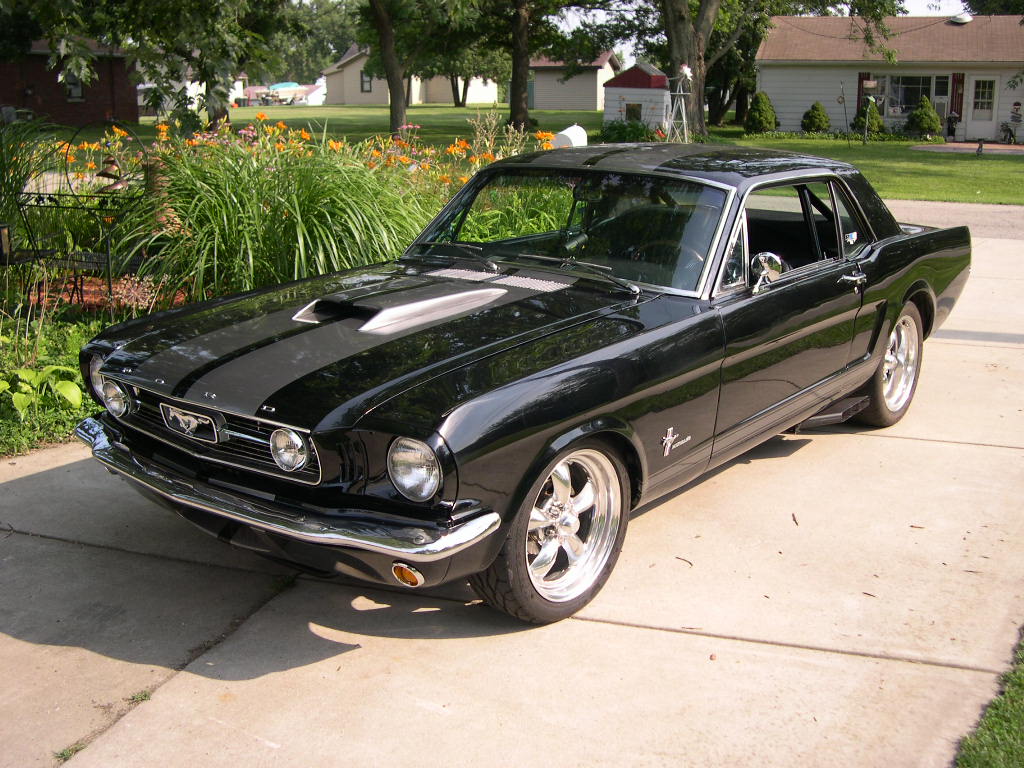 Project
completed.
Project
completed.
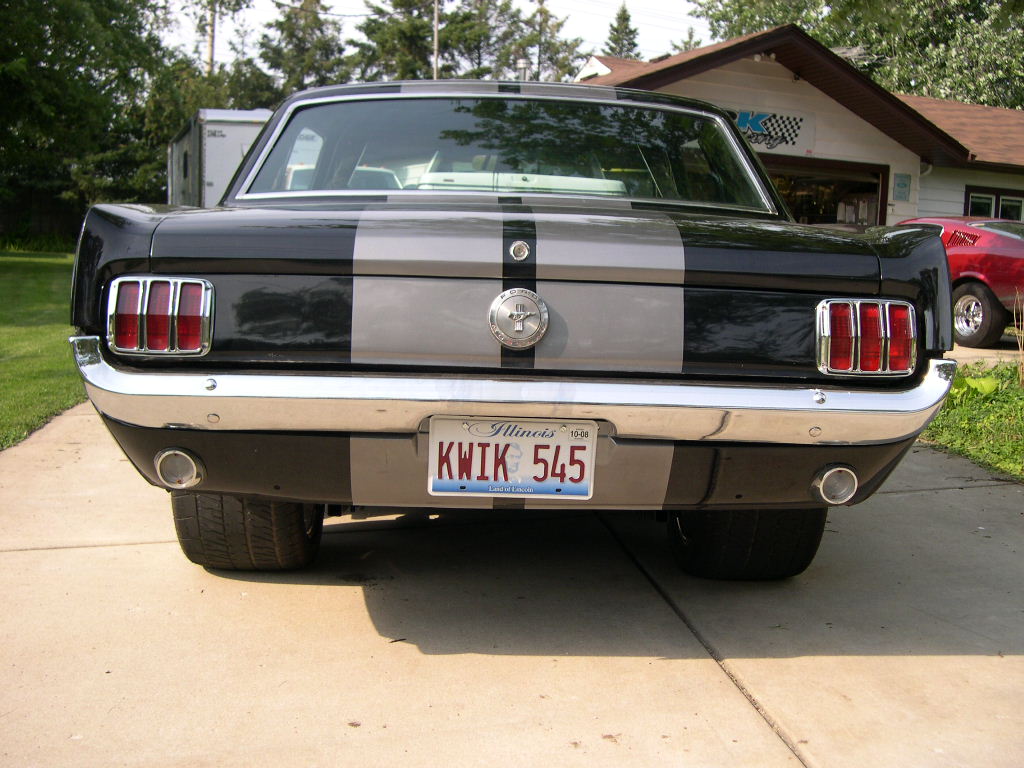 The
end.....
The
end.....